Quick Start
From a downloaded image to a running Bambuddy in about half an hour, most of which is the card writing itself.
There is a printed version
The same walkthrough is available as a 20-page A5 booklet — the one buyers get, also in German. Handy to have beside you rather than on the screen you are configuring.
1. Write the card
You need the image, a microSD card of at least 64 GB, and a card reader. See what to buy if you have not bought the hardware yet.
Download and verify
Two files arrive together: the image, whose name ends in .img.xz, and a short SHA256SUMS beside it.
Do not unpack the .img.xz
Raspberry Pi Imager reads the compressed file as it is. Unpacking it first costs time and about 22 GB of disk, and gains nothing.
A card written from a half-finished download boots to nothing in particular, and the failure looks like a hardware fault. One command rules it out — run it in the folder holding both files:
If it does not match, download it again rather than trying to use the file.
Raspberry Pi Imager
Raspberry Pi Imager is free and official, for Windows, macOS and Linux. Put the card in your reader before you start.
- Device — choose Raspberry Pi 5. This only filters the next screen; it does not change what gets written.
- Operating system — scroll to the very bottom and pick Use custom. It is the last entry, below Erase, and almost everyone scrolls past it.
- Select the
.img.xzyou downloaded. - Storage — choose your card. It shows the size and where the card is mounted; read it before continuing.
- Write, then confirm the erase warning. Imager asks once, in red, and it means it.
- Let it verify. It writes, then reads the card back to check every byte. There is a button offering to skip this. Don't.
- Write complete. The card is ejected for you.
Customisation stays greyed out, and that is correct
Imager skips its own settings screen for a custom image, so it jumps straight from Storage to writing. Hostname, WiFi, password and time zone all belong to the appliance's own setup wizard.
Check the storage device twice
Imager hides internal drives by default, but an external disk plugged into the same computer appears in that list looking much like a card reader. The confirmation is the last thing between you and the wrong drive.
2. Before you power on
Two of the things you need live on your printer, not on the appliance. Getting them ready first makes the rest quick.
- Storage inserted in the printer, if your model takes any — a microSD card on the X1 and P1 series, a USB stick on the H2 series. The A1 and A1 Mini have storage built in and need nothing. A printer that takes storage cannot receive a file without it.
- LAN Only Mode switched on, from the printer's touchscreen.
- Developer Mode switched on. It appears once LAN Only Mode is on. Without it Bambuddy can watch your printer but not control it.
- The printer's access code (eight characters, shown when Developer Mode is enabled), its IP address, and its serial number.
See Enabling Developer Mode for the full walkthrough.
The access code changes
Every time you toggle LAN Only Mode or Developer Mode off and on again, the printer generates a new access code. If Bambuddy stops connecting weeks later, this is usually why.
3. Power on
Put the card in the Pi and connect the power supply. The first boot takes a couple of minutes while the pre-baked Bambuddy container is loaded from the card.
Then pick whichever applies:
The appliance takes a DHCP lease and serves the setup wizard straight away. Open:
If that name doesn't resolve, find the appliance's IP in your router's client list and browse to http://<ip>:8000.
The appliance raises its own WiFi access point:
| Network | Bambuddy-Setup |
| Setup page | http://bambuddy.local:8000 |
Join it from a phone or laptop. Most devices open the setup page by themselves through the captive-portal prompt. If yours doesn't, browse to the address above.
Why the wizard waits
Before it lets you continue, the wizard waits for the clock to synchronise. A Raspberry Pi has no battery-backed clock, and an unsynchronised clock breaks every HTTPS connection the appliance needs to make — including the one that fetches your printers' certificates. This usually takes a few seconds.
4. The setup wizard
The wizard shows one screen at a time. On ethernet, the WiFi screen is skipped — you're already connected.
| Screen | What it asks |
|---|---|
| Welcome | Nothing. Continue. |
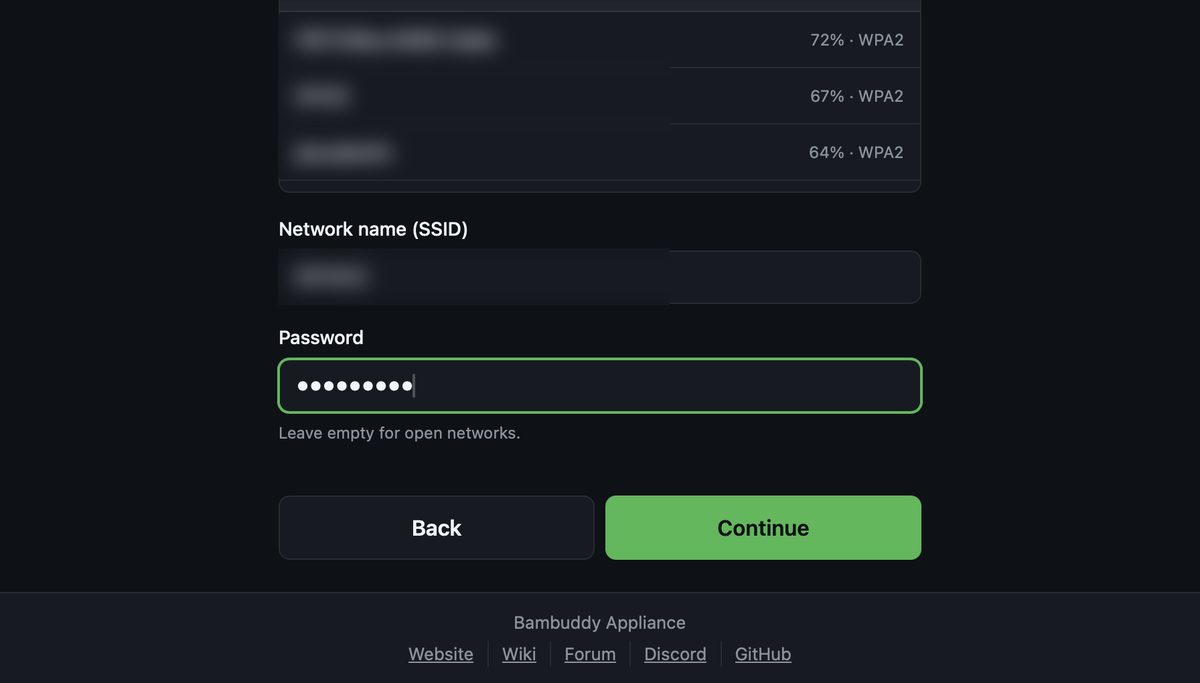
| Connect to your WiFi | Pick your network and enter its password. Skipped on ethernet. |
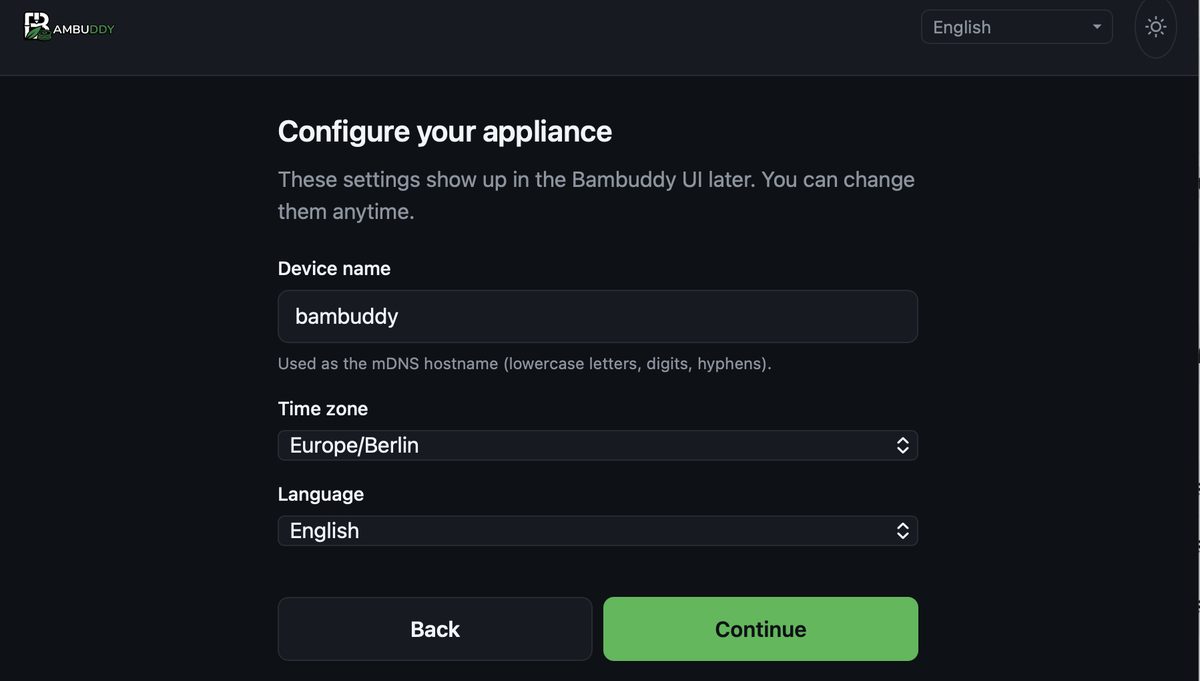
| Configure your appliance | A device name (used as its .local hostname), your time zone, and the language for Bambuddy. All changeable later. |
| Your licence key | The key from your order confirmation. Skippable — see below. |
| Set a password | Required — see below. |
| Almost there | The hand-off. Read the next section before pressing the button. |
Your licence key
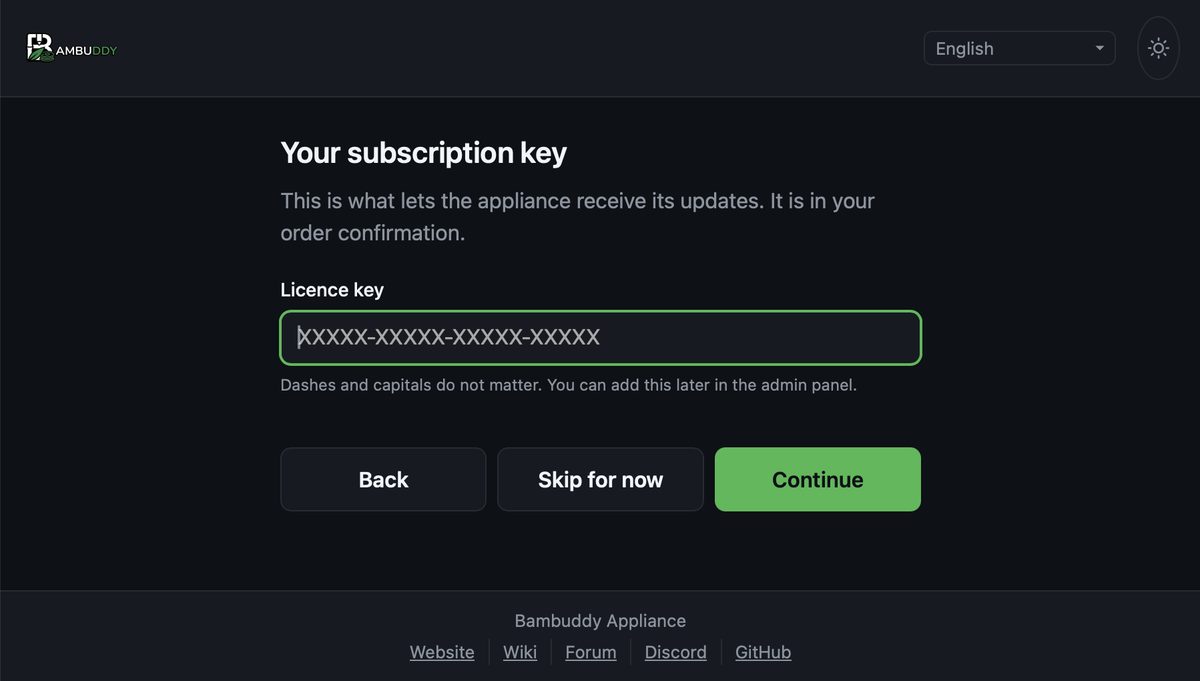
Twenty characters in four groups, from your order confirmation. Dashes and capitals do not matter — the wizard normalises what you type, including the letters the key alphabet avoids (I, L, O, U).
The key is what opens the update channel. It is not a licence to run the software: Bambuddy is AGPL and is never gated, which is why this screen has a Skip for now button and the password screen does not.
Skipping it costs nothing permanent
A unit with no key runs exactly as it would with one, and simply receives no appliance updates. The appliance's own page then carries a notice with an Enter a key button until you add one, and the key is sent with the next heartbeat — no reset, no re-flash.
5. Set the password
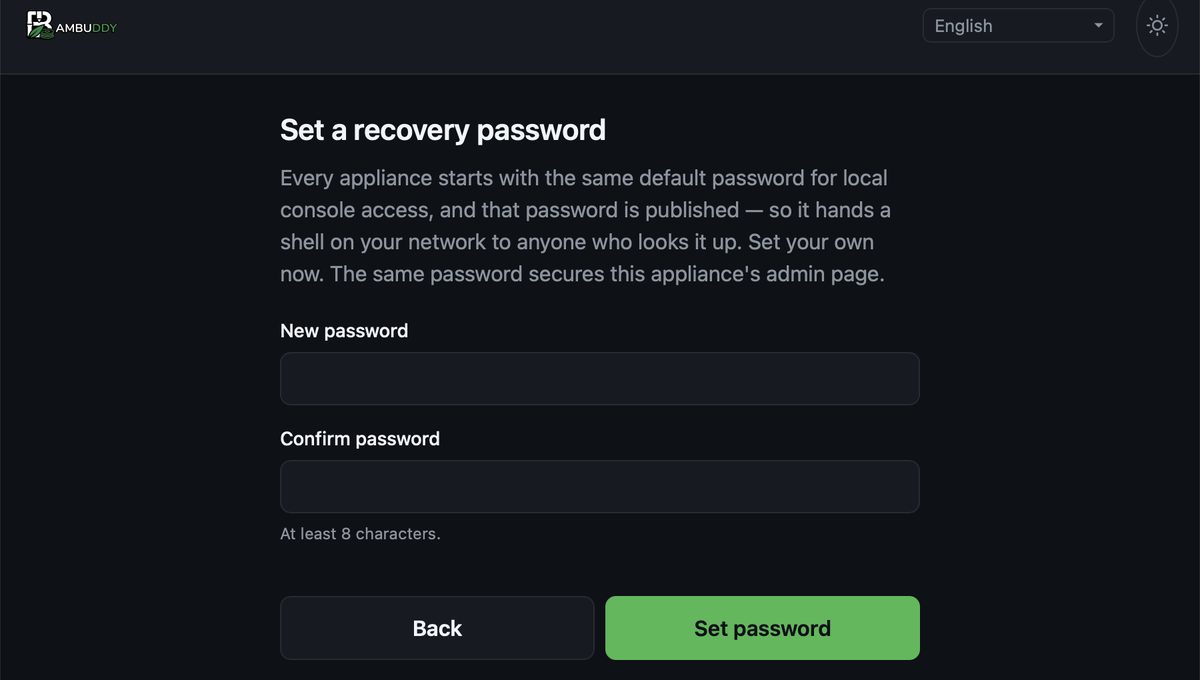
The wizard cannot be finished without this step. There is no skip button, and /api/apply and /api/finish both refuse until a password has been set, so the state is not reachable by driving the API either.
The appliance already gave itself a password
On its first boot, before SSH was allowed to accept a connection, the appliance generated a password unique to that card and wrote it to bambuddy-password.txt on the boot partition — readable by putting the card in any computer, which is the only out-of-band channel a headless box has.
That is what secures it until you reach this screen. Setting your own replaces it and deletes the file.
One password unlocks three things, and this screen replaces it in all three at once:
- the admin panel on port
8001, as useradmin - the local console
- SSH on port 22, which is enabled by default and reachable from your entire LAN
Eight characters minimum. There is no "forgot password" link and no email to send one to, so put it somewhere you will find it again.
You can change it later at any time:
6. The network switch
This is the only confusing part of the whole process, and it only happens if you set up over WiFi. Read it before you press the button.
- Press Apply and switch networks. The appliance shows its progress: loading Bambuddy, joining your WiFi, starting up.
- The
Bambuddy-Setupnetwork disappears. This is supposed to happen — the appliance has stopped being a hotspot and joined your network instead. - Your phone or laptop goes quiet. Reconnect it to your normal WiFi. It will not do this by itself, and nothing is broken.
- Open the address the wizard showed you, usually
http://bambuddy.local:8000. Give it thirty to sixty seconds.
Press Start Bambuddy, wait thirty to sixty seconds, and open the address shown. Your network never changes, so nothing disconnects.
Mistyped the WiFi password?
The appliance notices it can't join, and brings the Bambuddy-Setup network back up. Rejoin it — the wizard is waiting exactly where you left it, and you can try again. It retries this indefinitely rather than stranding you.
7. Set up Bambuddy
The first time Bambuddy opens it asks how you want to sign in. Create an account with a username and password, or choose to run without authentication on a trusted home network. You can change your mind later.
Two different doors
This account belongs to Bambuddy. It is separate from the appliance password you set in the wizard, which covers the admin panel, the console, and SSH.
8. Add your printer
Open the Printers page and press Add Printer. You need the three things you noted in Before you power on:
| Field | Where it comes from |
|---|---|
| Name | Whatever you like — Workshop X1C |
| IP address | The printer's screen, or your router |
| Access code | Eight characters, from Developer Mode |
| Serial number | The printer's screen |
Save. The indicator turns green once connected, and temperatures begin updating on their own. If it doesn't, it is almost always the access code — check it hasn't changed — or Developer Mode being off.
The full walkthrough is in First Printer Setup.
Where everything lives
| Address | What |
|---|---|
http://bambuddy.local:8000 | Bambuddy — printers, queue, history |
http://bambuddy.local:8001 | Appliance admin panel (user admin) |
ssh pi@bambuddy.local | Shell, for recovery |
Port 8000 is served by a small proxy sitting in front of Bambuddy. It passes the API, websockets, and camera streams straight through, so Home Assistant, your slicer, and the live view all behave exactly as they would against a plain Bambuddy install.
Network: extra IPs, and reaching it from anywhere
Two things on the admin panel's Network tab. Neither is needed for a normal setup — reach for them when one address isn't enough, or when you aren't home. Both are covered in full on the Admin Panel page.
Secondary IP aliases
A Virtual Printer impersonates a real one so your slicer can send straight to it, and each one needs an address of its own. Add one alias per virtual printer under Network › Secondary IP aliases, or from the shell:
bambuddy-appliance net-alias-add 192.168.1.50/24
bambuddy-appliance net-alias-remove 192.168.1.50/24
Aliases are added alongside the appliance's primary DHCP address and never replace it, so you cannot strand the appliance off its own network from here.
Pick an address your router won't hand out
Choose one outside the DHCP range. Otherwise your router will eventually lease the same address to another device, and the two will fight over it.
Remote access (Tailscale)
Reach your printers from anywhere without opening a port on your router. Tailscale builds a private connection between your own devices; the account is free and takes about a minute.
- Network › Set up remote access. The daemon ships logged out and stays that way until you sign in here.
- Scan the QR code with your phone. Sign up or log in, then approve the appliance. The page notices by itself.
- Use the address it gives you. Paste the MagicDNS name into your slicer's Add Printer dialog to reach your virtual printers from anywhere on your tailnet.
Next
- Admin Panel — what the box itself can tell you
- Updates & Backups — before you need them, not after
- Recovery — the factory reset, lockouts, and what to try first