Projects
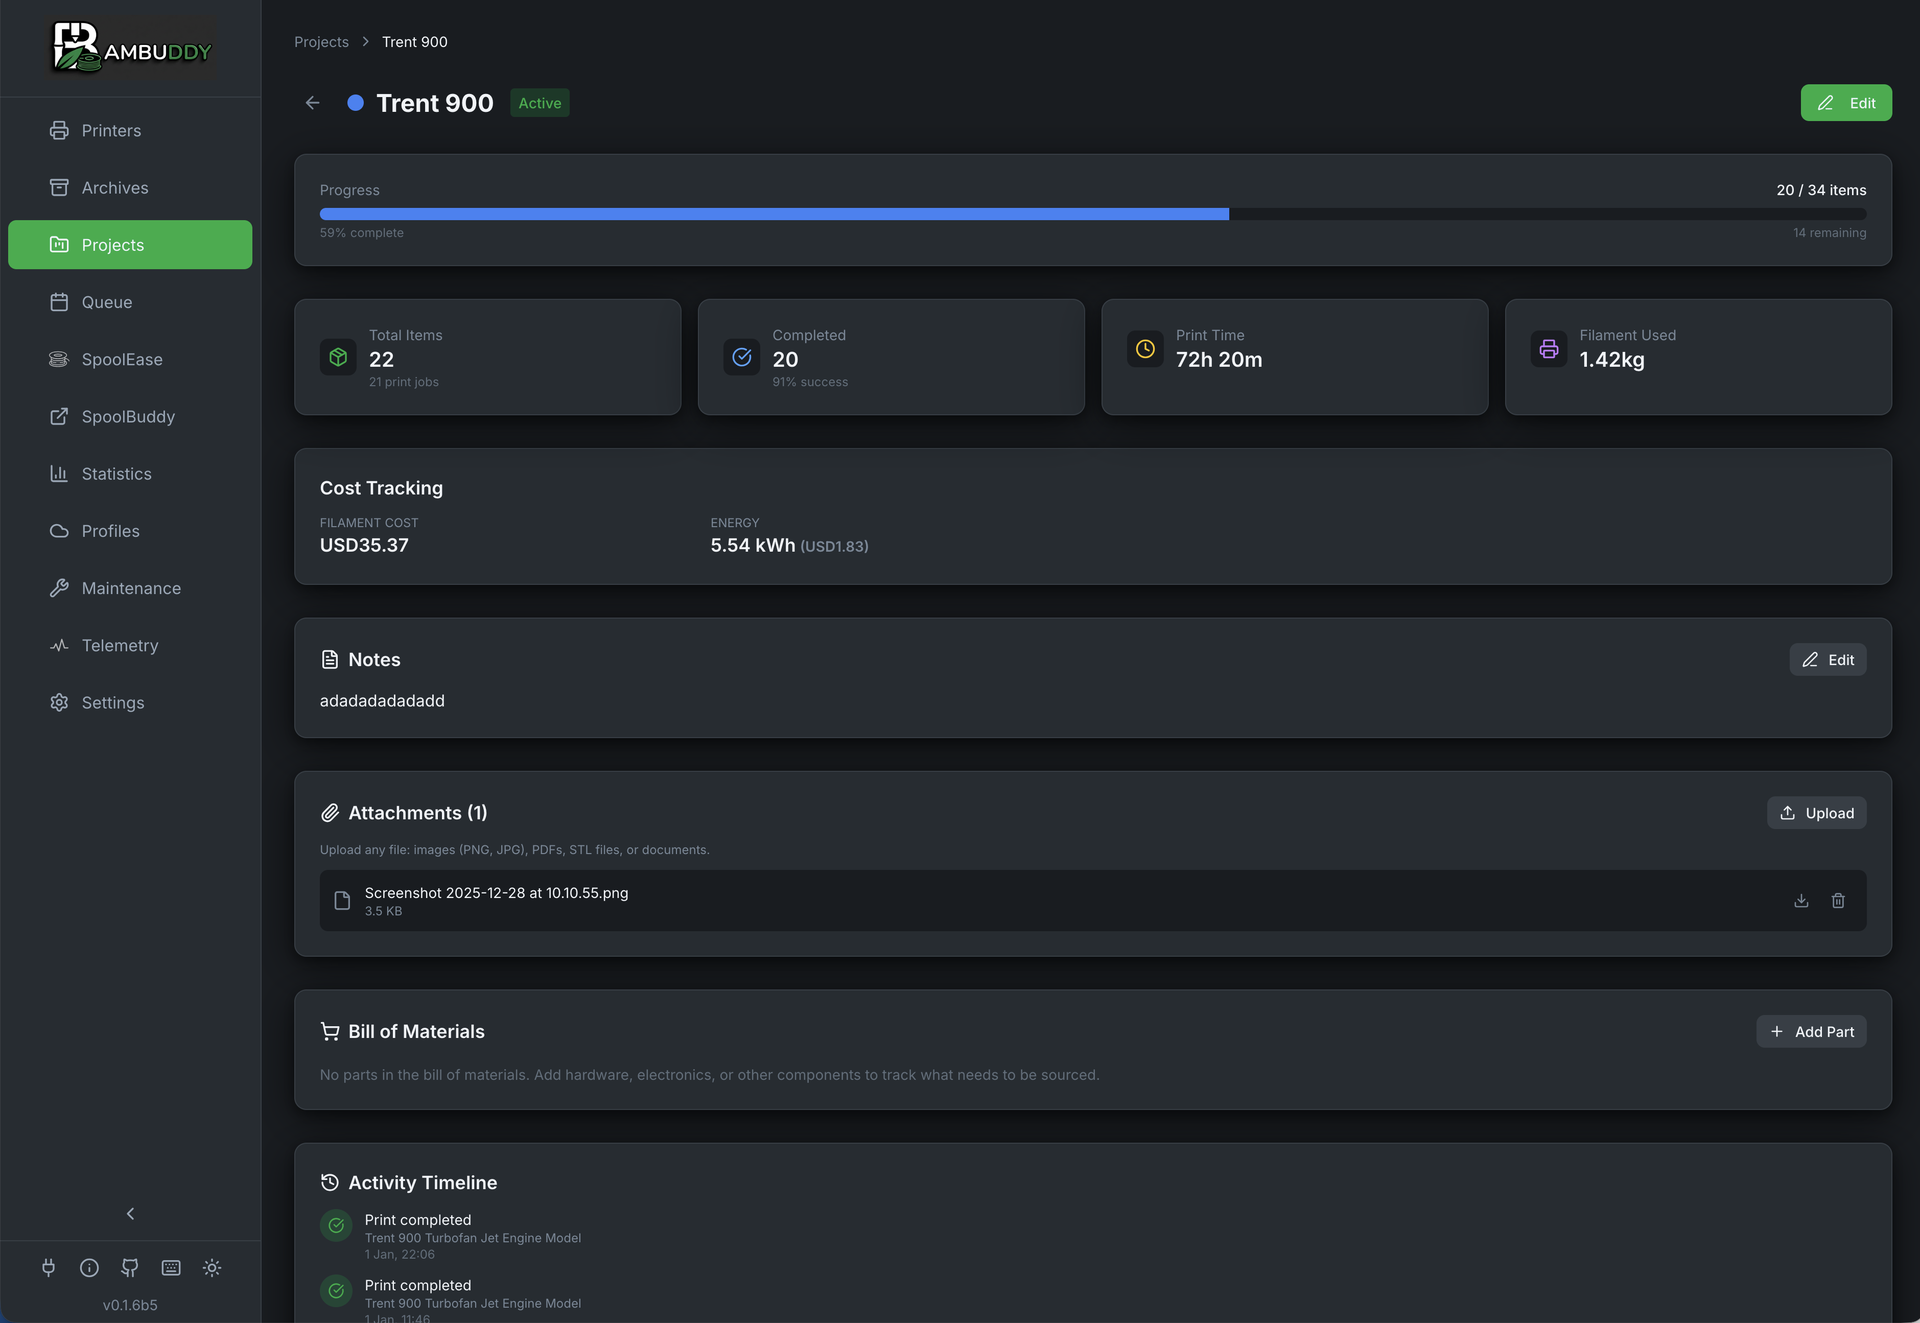
Group related prints into projects to track multi-part builds, gift sets, or any collection of related prints.

What Are Projects?
Projects let you:
- Group prints - Organize related archives together
- Track progress - See completion status
- Set targets - Define how many items needed
- Track quantities - Count items per print for batch printing
- Bill of materials - Track sourced parts (screws, electronics)
- File attachments - Store documentation and references
- Cost tracking - Budget and expense tracking
- Color code - Visual identification
- Add notes - Document the project
Use Cases
| Project | Description |
|---|---|
| Voron Build | All parts for a Voron printer |
| Gift Set | Prints for a birthday gift |
| Home Organizers | Kitchen and bathroom organizers |
| Prototypes | Iterations of a design |
| Commission | Client order tracking |
Creating a Project
- Go to the Projects page
- Click New Project
- Fill in the details:
| Field | Description |
|---|---|
| Name | Project name (required) |
| Description | What the project is for |
| Color | Badge color for identification |
| Target Plates | Number of print jobs needed |
| Target Parts | Total number of parts/objects needed |
| Copies per File | How many times each printable file should be printed (enables per-file progress and the Complete Sets bar) |
| Parent Project | Nest this project under another one — see Sub-Projects |
- Click Create
Plates vs Parts
- Plates = Number of print jobs (each time you click print)
- Parts = Total objects printed (can be multiple per plate)
Example: A Voron build might need 25 plates to print 150 parts total.
Adding Archives to Projects
From Archive Card
- Right-click an archive card
- Select Add to Project
- Choose the project
- Archive is linked
From Archive Details
- Open an archive
- Click the Project dropdown
- Select a project
- Changes save automatically
Bulk Assignment
Assign multiple archives at once using the multi-select toolbar:
- Click Select button (or Shift+click / Ctrl+click archives)
- Select the archives you want to assign
- Click the Project button in the bottom toolbar
- Choose a project from the list
- All selected archives are assigned instantly
Remove from Project
The same modal has a "Remove from project" option to unassign archives in bulk.
Progress Tracking
Track how close you are to completing a project with separate progress for plates and parts:
Dual Progress Bars
When you set both target plates and target parts, you'll see two progress bars:
Plates Progress
[████████░░░░░░░░░░░░] 40%
2 of 5 print jobs

Parts Progress
[████████░░░░░░░░░░░░] 40%
10 of 25 parts
Progress States
| State | Description |
|---|---|
| Not started (0%) | |
| In progress | |
| Complete (100%) |
Plates Progress
Tracks the number of print jobs completed:
- Plates Target: 5 with 2 prints done = 40%
- Based on archive count (not quantities)
Parts Progress
Tracks the total number of parts/objects printed:
- Parts Target: 25 with 10 parts printed = 40%
- Sum of all archive quantities
Per-File Progress & Complete Sets
For projects made of many distinct files that each need to be printed N times (e.g. 13 plates, 10 copies each), set the optional Copies per File target in the project dialog:
- Every printable file in the project's linked folders shows an X / N badge with a mini progress bar: gray = not started, amber = in progress, green = target reached.
- The progress card gains a Complete Sets bar: the minimum per-file count across all printable files — the number of finished assemblies you can ship right now. If 12 of 13 plates are at 3 copies but one is at 2, you have 2 complete sets.
- Without the target, printable files simply show how many times they've been printed (e.g. 3×).
Only completed prints count — failed, cancelled, and in-progress runs don't advance a file's count. Counting is scoped to the project: prints started from the project page or queued from a project-linked File Manager folder are attributed automatically.
Auto-Detection from 3MF
When a print is archived, BamBuddy automatically detects how many parts/objects were on the plate:
- Reads
slice_info.configfrom the 3MF file - Counts non-skipped objects
- Sets the archive quantity automatically
Auto-Detection Example
You print a plate with 4 copies of a bracket:
- BamBuddy detects 4 objects in the 3MF
- Archive quantity is set to 4 automatically
- Project parts count increases by 4
Manual Quantity Override
You can still manually adjust the quantity:
- Open the archive in edit mode
- Set Items Printed to the correct number
- Project progress updates automatically
Set it to 0 when a print finished but nothing on the plate was usable - a jam that the printer still reported as a success, for example. The job then counts as producing no items towards the project.
Updating Existing Archives
If you have existing archives with quantity=1, run the migration script:
# Preview changes
python scripts/update_archive_quantities.py --dry-run

# Apply changes
python scripts/update_archive_quantities.py
This re-parses all 3MF files to extract the correct object counts.
Color Coding
Each project has a color-coded badge:
Available Colors
- Red
- Orange
- Yellow
- Green
- Blue
- Purple
- Gray
Badge Display
Project badges appear on:
- Archive cards
- Archive list view
- Project overview
Project Cards
Each project displays as a card with plates and parts stats:
┌────────────────────────────────────────┐
│  [Color] Voron Build          150/200  │
│                                parts   │
│  Building a Voron 2.4r2 printer       │
│                                        │
│  Plates [████████░░░░] 40%            │
│  20/50 print jobs                      │
│                                        │
│  Parts  [████████████░░░] 75%         │
│  150/200 parts                         │
│                                        │
│  📦 20 plates  🎯 150 parts            │
└────────────────────────────────────────┘
Card Information
- Color badge - Visual identification
- Name - Project title
- Progress badge - Parts completed / target
- Plates progress - Print jobs completed
- Parts progress - Objects printed
- Stats footer - Quick view of plates and parts count
- Sub-project count - How many projects sit directly beneath this one
- Part of ... - Which project this one belongs to, when it is a sub-project
Sub-Projects
A large build usually is not one flat list. Set a Parent Project on the project dialog and it becomes a sub-project of that one; nesting goes as deep as the work needs, so an assembly can sit under a section which sits under the whole build.
On the Projects Page
Sub-projects are not scattered through the grid. A project that has them takes the full width of the row and its sub-projects are drawn inside it, indented behind a rule in the project's own colour:
┌──────────────────────────────────────────────────────────┐
│  [Color] Voron Build                        🗂 2  150/200 │
│  Building a Voron 2.4r2 printer                          │
└──────────────────────────────────────────────────────────┘
   │  ▼ SUB-PROJECTS OF VORON BUILD  2
   │  ┌───────────────────────┐  ┌───────────────────────┐
   │  │ [Color] Frame         │  │ [Color] Toolhead      │
   │  └───────────────────────┘  └───────────────────────┘
The nesting repeats at every level, so a sub-project that has its own sub-projects gets its own rule and its own group.
When the status filter hides a parent
Filtering to Active can hide a completed parent while its sub-projects are still active. Those sub-projects stay on the page as ordinary cards and carry a Part of ... caption instead, so nothing disappears just because its parent did.
Folding Sub-Projects Away
A deep hierarchy over a few hundred archives turns the page into one long scroll, so every group can be shut:
- One group - click its Sub-projects of ... caption. The caption stays where it is with the chevron pointing right, so you can see what is folded and click it again to unfold.
- The whole page - the Collapse button next to the status filter tabs sets the default for every group and is remembered across reloads. Press it again to go back to everything expanded.
The number on the caption counts the sub-projects that are actually in that group, which is not always the number on the parent card's badge: the badge counts sub-projects in every status, so a parent with one active and one archived sub-project shows 2 on its badge and 1 on its caption while the Active filter is on.
Folding one group is a passing choice
Shutting or opening a single group applies until you press Collapse, which resets every group to the new default. Only the Collapse setting itself is remembered across reloads.
The Master Project View
Open a project that has sub-projects and it gains a second card covering the whole tree:
- Print jobs and parts
- Print time
- Filament used
- Total cost (filament, energy and BOM)
- Progress against every target in the tree added together
Two sets of numbers, and they mean different things
The stats at the top of the page are still this project's own prints. The roll-up card below them is this project plus everything nested under it. A project with no sub-projects shows only the first set — there is nothing to add, so there is no second card.
Each sub-project listed on the page carries its own branch's totals, not just its own prints. So a sub-project that is itself a parent reports what its whole branch did, and the listed rows add up to the roll-up card minus the master's own prints.
Rules
- A project cannot be its own parent, and cannot be moved underneath one of its own sub-projects — that is a loop, not a hierarchy. The parent picker leaves those options out rather than letting you pick one and fail.
- Deleting a project in the middle of a tree lifts its sub-projects up to its own parent. Deleting a top-level project leaves its sub-projects as top-level projects. Nothing beneath a deleted project is deleted with it.
- Archives, queue items and BOM entries belong to the project they were assigned to. Nesting does not move them; it only decides what the roll-up adds together.
Editing Projects
- Open the three-dot menu () in the top-right corner of a project card and choose Edit. On a mouse the menu button appears when you hover the card; on a phone or tablet it is simply always there.
- Modify any field
- Click Save
Delete lives in the same menu.
Editable Fields
- Name
- Description
- Color
- Target Plates (print jobs)
- Target Parts (objects)
- Parent Project
Filtering by Project
Filter archives to show only those in a project:
- Go to Archives page
- Click the Project filter
- Select a project
- Only linked archives are shown
Printing Files from a Project
If a project has one or more linked library folders, the project detail page lists the printable files from every folder inline — no need to detour through the File Manager to reprint.
What Shows Up
Under each linked folder header you'll see a row per file with:
- A thumbnail (if one is available)
- The file name and a type badge (3MF, GCODE, STL, …)
- Print button — only on sliced files (
.gcodeand.gcode.3mf)
Files that can't be printed directly (.stl, .step, etc.) still appear in the list but without action buttons.
Workflow
- Open the project detail page
- Find the file under the linked folder you want
- Click Print
- Pick your printer, plate, dispatch option, and print options
- Start the print
Auto-Linking
Prints triggered from the project detail page are automatically associated with the originating project. The resulting archive shows up under the project's archive list as soon as the print completes — no manual "Assign to project" step required.
Prints Started from Elsewhere
If you print the same file from the File Manager, Archives page, or a link that wasn't launched from the project view, the archive is not auto-linked. Only prints launched from the project detail page get the implicit project association.
Deleting Projects
Deleting a project:
- Click the delete icon on a project card
- Confirm deletion
Archives Preserved
Deleting a project does NOT delete the archives. They remain in your archive but are no longer linked to a project.
Import & Export
Share projects between Bambuddy instances or backup your project data.
Exporting a Single Project (ZIP)
Export a complete project bundle including all files from linked library folders:
- Open the project detail page
- Click the Export button
- A ZIP file is downloaded containing:
project.json- Project settings, BOM items, and folder metadatafiles/- All files from linked library folders
Complete Bundles
ZIP export includes the actual 3MF/gcode files from linked folders, making it easy to share complete project bundles.
Exporting All Projects (JSON)
Export all projects as metadata only (no files):
- Go to the Projects page
- Click the Export button in the header
- A JSON file is downloaded with all project metadata
Metadata Only
Bulk export is JSON format without files. Use single-project ZIP export if you need the files.
Importing Projects
Import projects from ZIP or JSON files:
- Go to the Projects page
- Click the Import button
- Select a
.zipor.jsonfile
ZIP Import:
- Creates the project with all settings
- Creates linked library folders
- Extracts and stores all files from the ZIP
- Files are available in File Manager
JSON Import:
- Creates the project with all settings
- Creates empty linked folders (names only)
- Supports single project or batch import (array of projects)
Use Cases
- Share project templates - Export a project setup for others to use
- Migrate instances - Move projects between Bambuddy servers
- Backup projects - Archive important project bundles with all files
- Collaborate - Share complete project bundles with team members
Project Archives View
Click a project card to see all its archives:
- Grid view of all linked prints
- Same filtering and sorting as main Archives
- Quick access to add more prints
Bill of Materials
Track non-printed parts needed for your project (screws, electronics, hardware):
Adding BOM Items
- Open a project
- Scroll to Bill of Materials
- Click Add Item
- Fill in the details:
| Field | Description |
|---|---|
| Name | Part name (e.g., "M3x8 SHCS") |
| Quantity | How many needed |
| Unit Price | Cost per item |
| Sourcing URL | Where to buy |
| Remarks | Additional notes |
Tracking Acquisition
- Check the box when a part is acquired
- Progress bar shows acquired/total items
- Use Hide done to focus on remaining items
File Attachments
Attach reference files to your project:
Supported File Types
| Category | Extensions |
|---|---|
| Images | JPG, PNG, GIF, WebP, SVG |
| Documents | PDF, DOC, DOCX, TXT, MD |
| 3D Files | STL, OBJ, 3MF, STEP, F3D, SCAD |
| Archives | ZIP, RAR, 7Z, TAR, GZ |
| Scripts/Configs | PY, SH, CFG, GCODE, INI |
| Data | JSON, XML, YAML |
Uploading Files
- Open a project
- Scroll to Attachments
- Click Upload or drag and drop
- Files are stored with the project
Cost Tracking
Track project expenses:
Cost Categories
- Parts cost - Sum of BOM item prices
- Additional costs - Manual entries for other expenses
Currency
Uses your configured currency from Settings → General.
Project Ideas
Multi-Part Prints
Create a project for complex models that print in multiple pieces. Track which parts are done.
Gift Planning
Start a project before a birthday or holiday. Add prints as you complete them.
Printer Builds
Building a Voron, Trident, or other kit? Track every printed part.
Iterative Design
Group prototypes of the same design to see your progression.
Client Orders
Track prints for commission work or client requests.